To manage ads, visit ‘Campaigns‘ and click the title of your campaigns. From there you’ll go to ‘Campaign Details’ where all of the important information for a campaign is displayed.
Add Ad Files
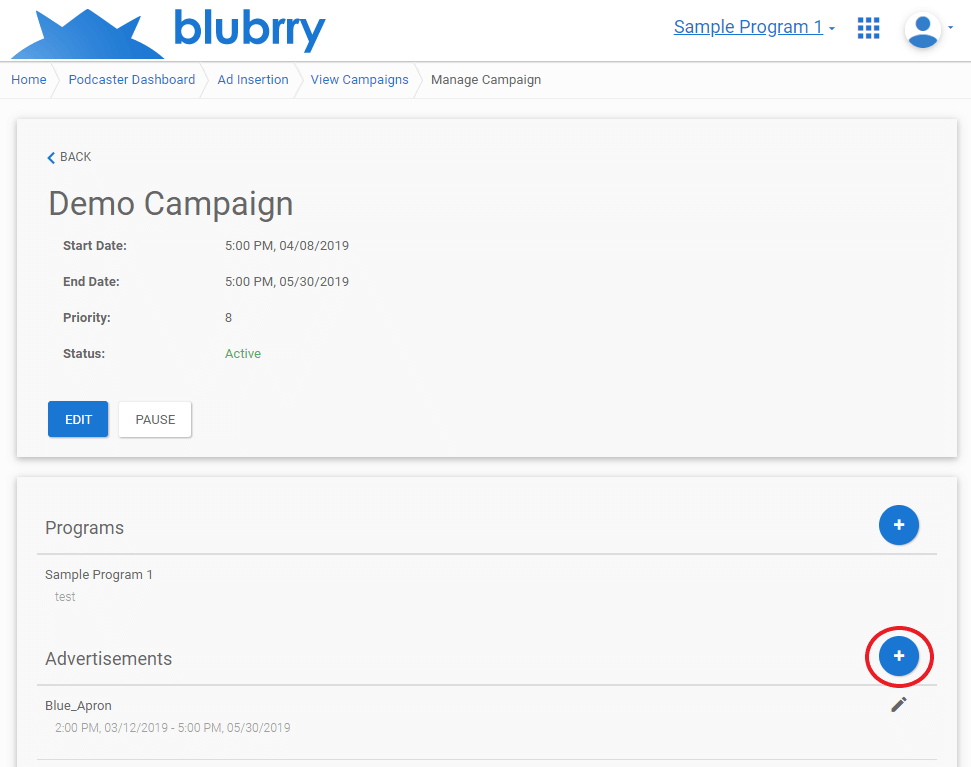
To add an advertisement to you campaign, click on the blue circle with a ‘plus’ symbol in the middle on the ‘Campaign Details’ page. It is circled in red in the image below.
On the ‘Add Advertisement’ page, include the title, and start and end date. The default start and end dates are the same as the campaign. If you choose a start or end date that falls outside the range of the campaign, the designated campaign start and end date will override it. Remember all ads will stop being served when your campaign expires.
Next, you will need to choose an insertion position. If you decide pre-roll, ads will be inserted at the start of your podcast episodes, with no metadata added to the episode audio file needed. Post-roll ads will be inserted at the end of episodes. Mid-roll ads are intended to be inserted in the middle of your episodes, you will need to specify where to insert it in the ID3 tag of the episode audio file as outlined on this page or using the tool below.
Specifying Insertion Point in Episode Audio Files:
If you chose one of the mid-roll options for your insertion position, you will need to have metadata on the audio file comment file within the ID3 tag of any episode you want the ad to run in a midroll position. You can do this manually with an ID3 Editor or use or Midroll management tool in the Blubrry Dashaboard find the details here. Note you can only edit the insertion points with our tool once the episode is published.
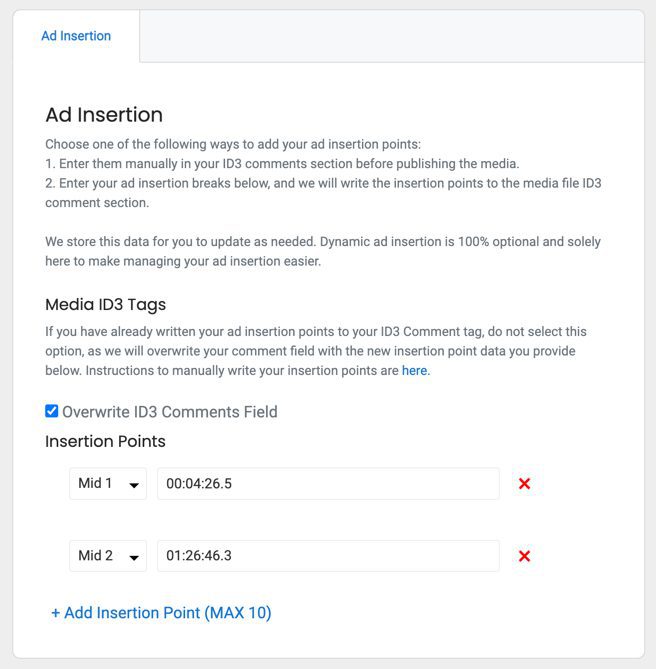
The metadata data added will specify the insertion position of the ad and the timestamp you want to insert it in. For example, if your ad’s insertion position was Mid-roll 1, and you want to insert it 5 minutes and 10 seconds into the episode, you would add the metadata to the ID3 comment field ‘mid1 00:05:10.’ Be sure not to include any other data in your actual ID3 comment field. You can add this metadata to the audio file with your favorite audio production software, or by using the tool above.
The last form field you need to fill out is priority. If attempting to insert two or more ads at the same position, the ad with the highest priority will be inserted.
You must then submit the form by clicking “SAVE” at the bottom. Saving will be redirected to the ‘Upload Ad Audio’ page.
To upload an audio file for your ad, click ‘SELECT FILE’ and choose an audio file. Then click ‘UPLOAD.’ After uploading, you will be redirected to the ad details page. Make sure your audio file meets the requirements mentioned here.
Edit Ad
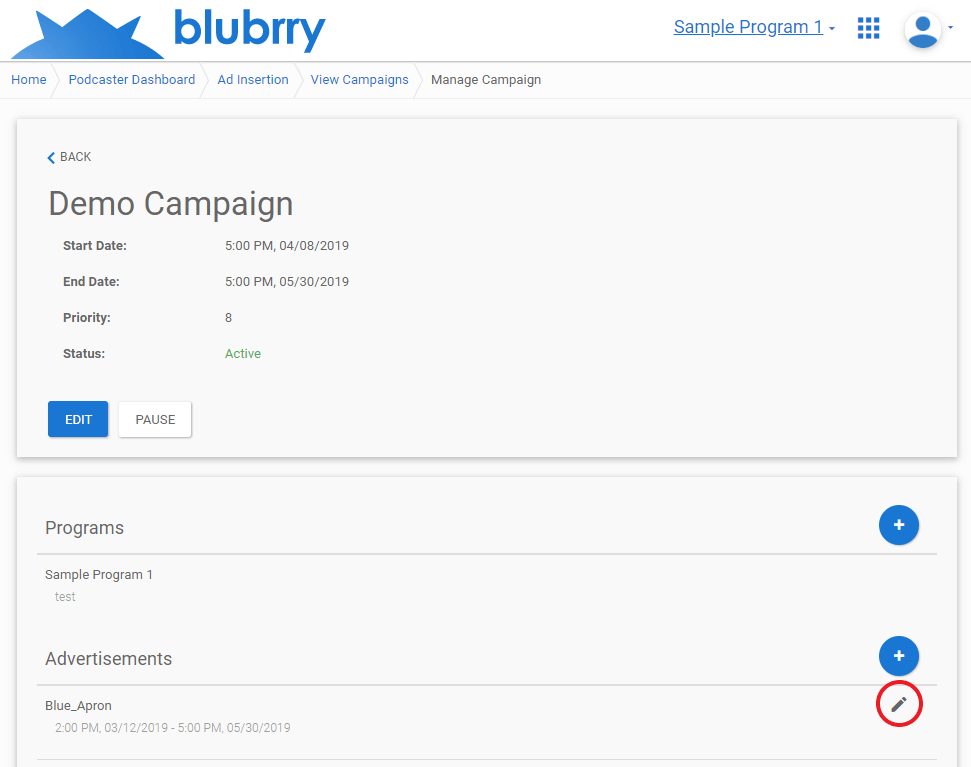
To edit an advertisement, click on the pencil icon to the right of the title of the ad you want to edit.
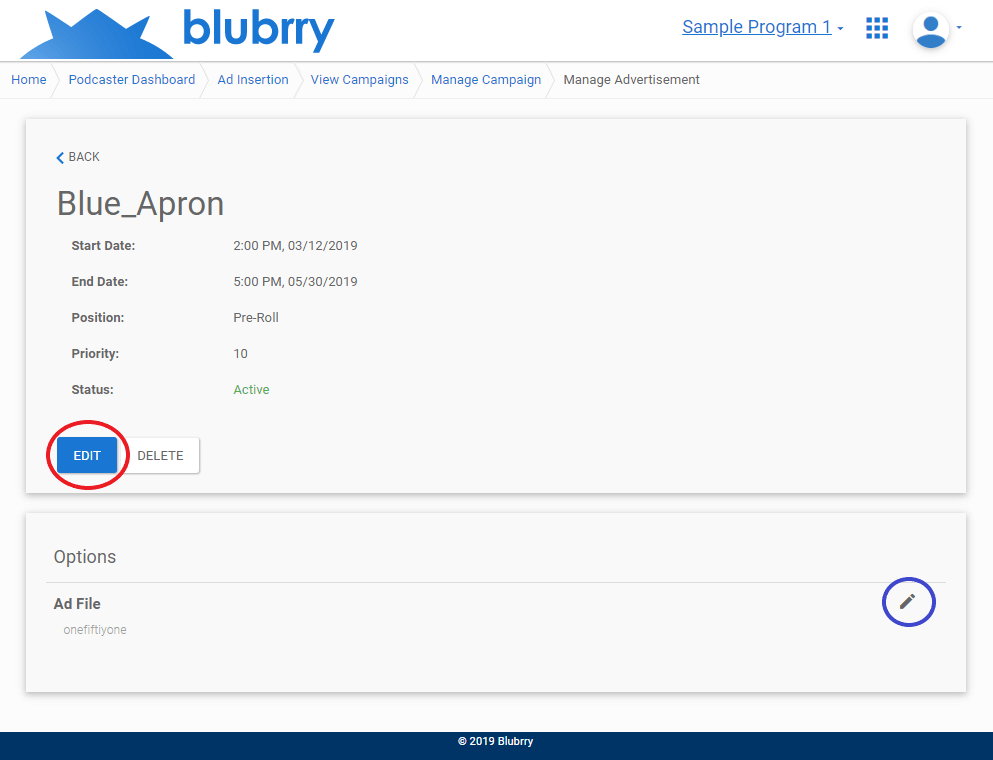
Clicking the pencil icon will take you to the ‘Ad Details’ page, where all of the essential details for an ad are displayed. To edit the ad details, click the blue ‘EDIT’ button in the middle of the page. This is circled in red in the image below. To edit the ad file itself, click the pencil icon to the right of its title (circled in blue in the image below).
The blue ‘EDIT’ button will take you to a form similar to the one used to add the advertisement. See this page’s ‘Add Ad’ section for more details on each form field. Remember to click ‘SAVE’ at the bottom of the form when satisfied with your changes.
The pencil icon will load a page where you can change the ad’s audio file.