Full Ad Insertion includes the following:
Pre-roll: Advertisements that are at the before the beginning of your episode.
Mid-roll: Typically found in the middle of the episode, but can be placed at any point in the episode, can run a bit longer as you’ll already have the audiences attention.
Post-roll: Advertisements that are after the episode ends.
File Rebuild: When you add or change an ad in a campaign, the mp3 file must be rebuilt. When it is saved to Blubrry we create a new file for you. For each file you rebuild, we charge 10 cents. Make sure you include all of the ad spots you’d like in an episode before you save.
Multiple Shows Per Campaign: More than one podcast/show utilizing the same campaign.
Multiple Campaigns Per Show: More than one ad deal per podcast/show. For ex: different companies for pre-, mid-, and post-roll.
Getting Started
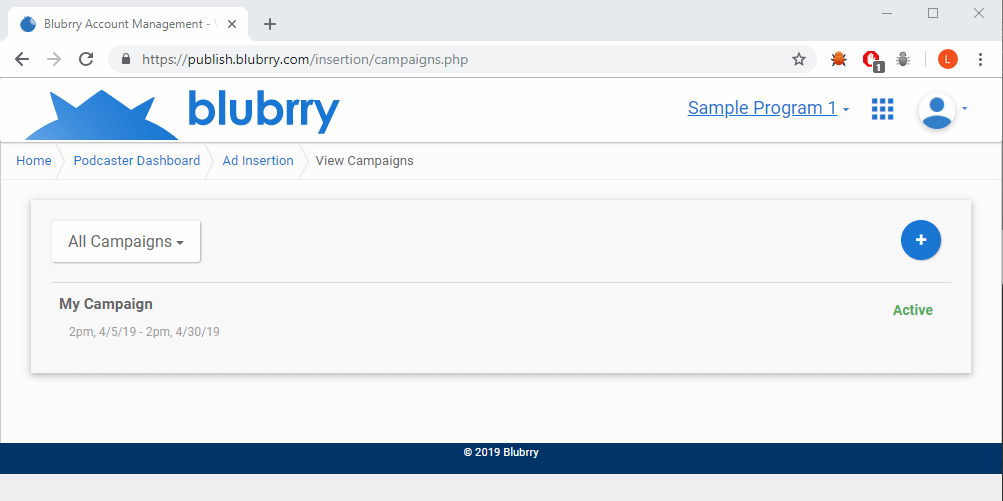
- To get started with your campaigns visit Ad Insertion. Here you’ll find ‘Campaigns,’ which displays all of your campaigns.
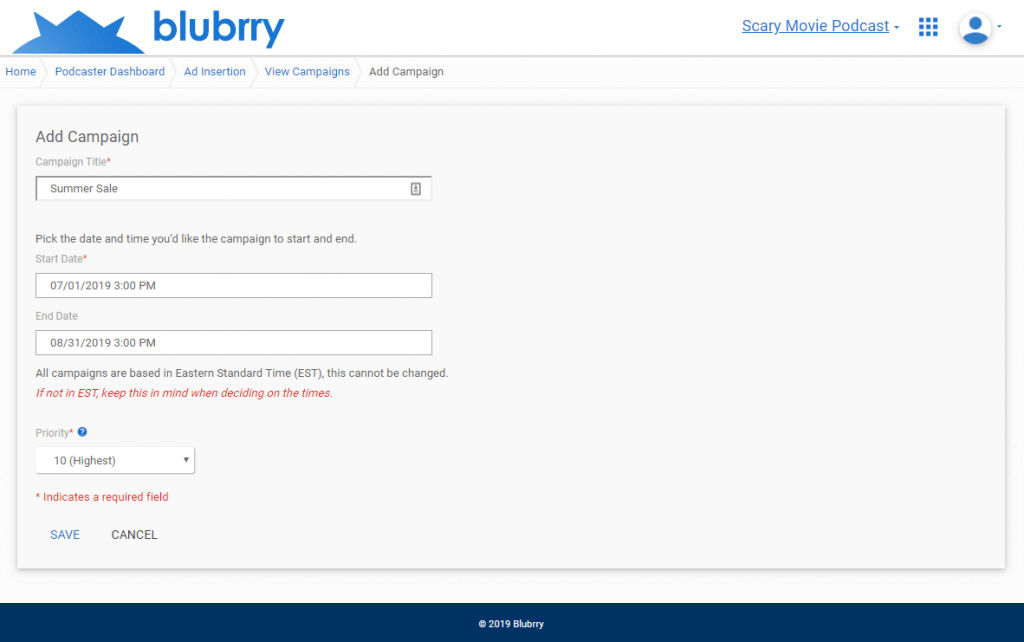
- Next, click on the blue ‘plus’ circle to create a new campaign. Here you’ll load the ‘Add Campaign’ page, where you will provide a title, start date, end date and priority for the campaign you want to setup.
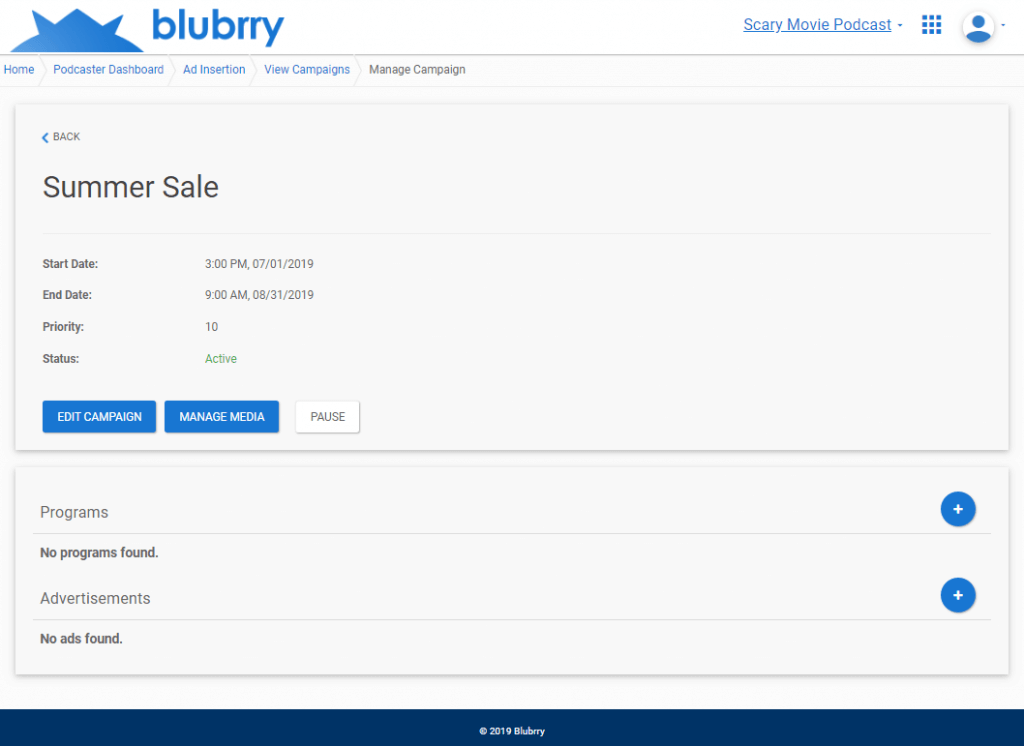
- At this point the newly created campaign is in draft status. You need to create an ad, add podcasts, and select past episodes.
Picking the Podcast(s)
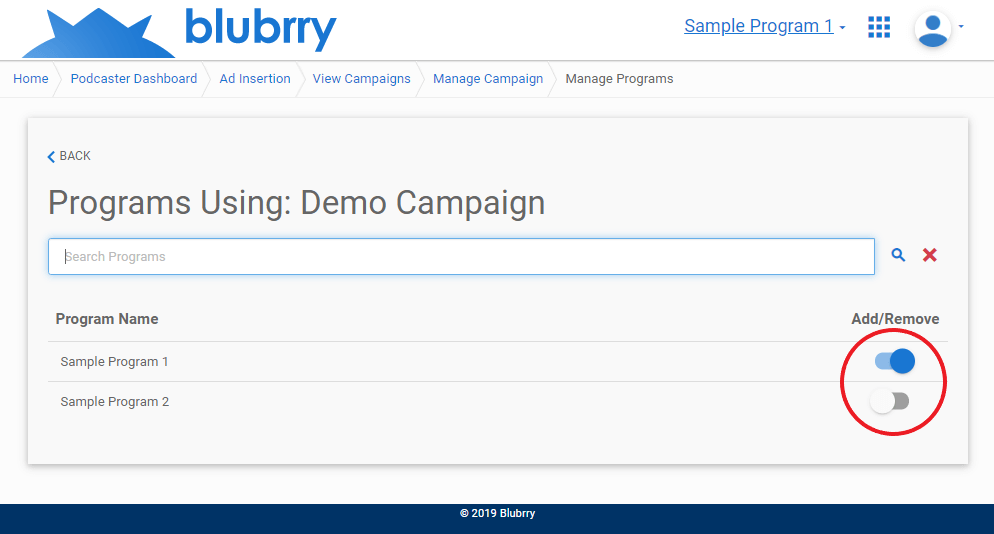
- Next up is choosing the program. Click the blue circle to add your podcast/show. This will take you to ‘Manage Programs.’
- Add one or more available podcast/shows. After selecting a podcast/show click ‘Back’ (not the browser’s back button). See picture below.
- You can add/remove podcast/shows – blue when selected. After selecting a podcast/show click ‘Back’ (not the browser’s back button).
- Next, you will need to add an advertisement. Click the blue circle with a plus symbol that is directly to the right of the Advertisement heading. This will load the “Add Ad” page, where ads are created.
Specifying Ads
-
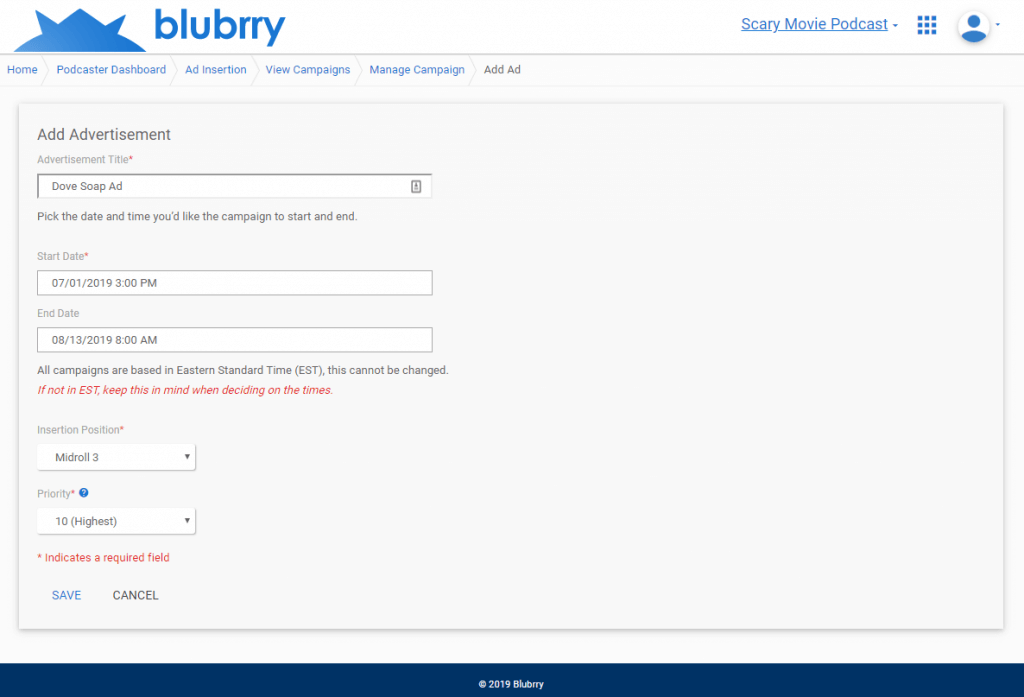
- Fill out and save the “Add Advertisement” form. Specify a title, and starting and end dates for the ad. Critical: start and end dates fall within the start and end dates of the current campaign. If you do specify a start or end date outside of the campaign’s date range, the start and end date of the campaign will override the ad’s.
- Next, choose an insertion position from the drop down (each position is a place for a potential ad). You will also need to choose a priority. Be sure to save at the bottom of the form. You’ll be redirected to the ‘Upload Ad Audio’ page, where you will upload an audio file for the ad.
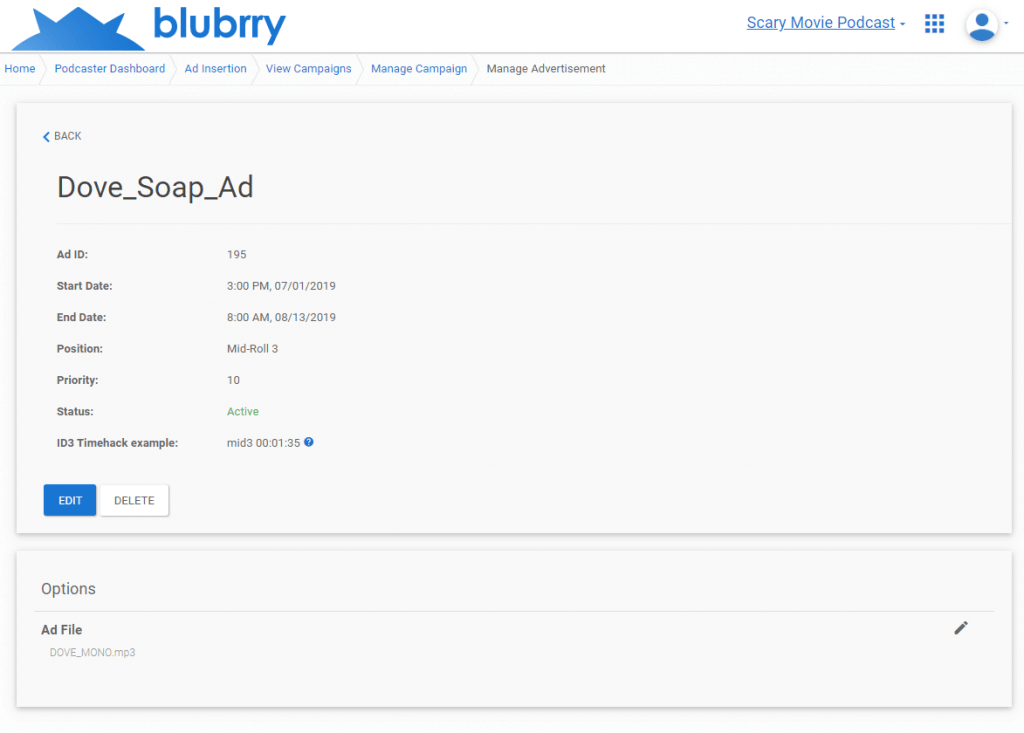
- To upload an audio file for your ad click ‘Select File’ and follow the prompts. After uploading, you will be redirected to the ‘Ad Details’ page.
Note: If using mid-roll, you will need to add an ID3 tag where you’d like to insert the ad. You’ll have to re-upload past episodes with ID3 tags if want to insert an ad. The new ID3 tag will specify the insertion position and the timestamp. For example, if your position was Mid-roll 5 and you wanted to insert it 5 minutes and 10 seconds into the episode you would comment ‘mid5 00:05:10’ (do not include quotes in actual ID3 tag).
If you want to insert multiple mid-roll ads, make multiple ID3 tags separated by commas. For example mid3 00:01:00, mid4 01:01:05. You can add the ID3 tag to the audio file in your preferred audio production software, or by editing the file directly.
Selecting Episodes
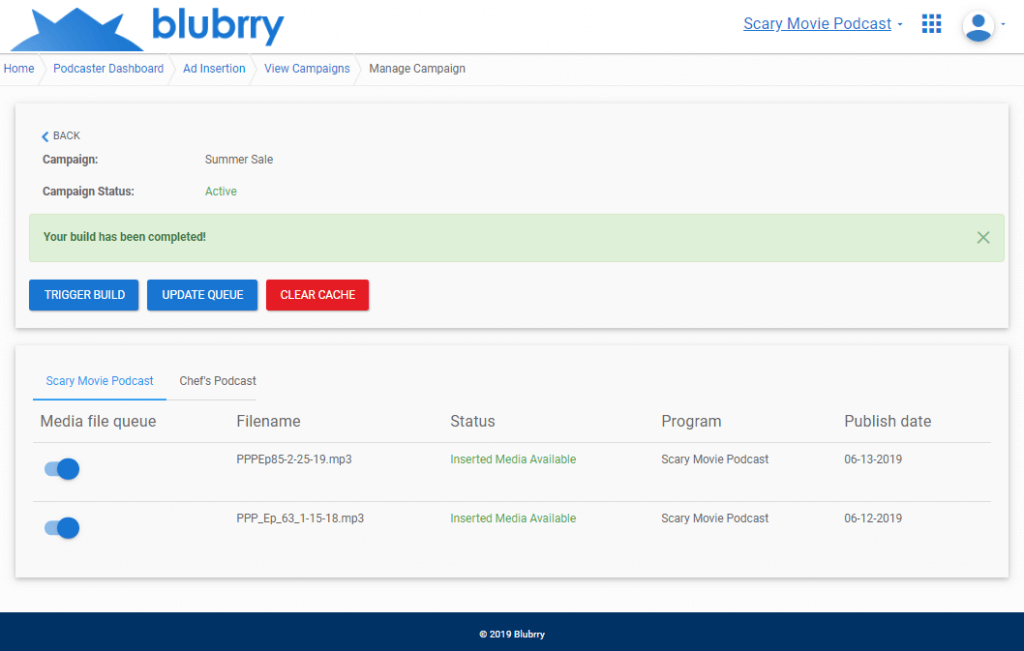
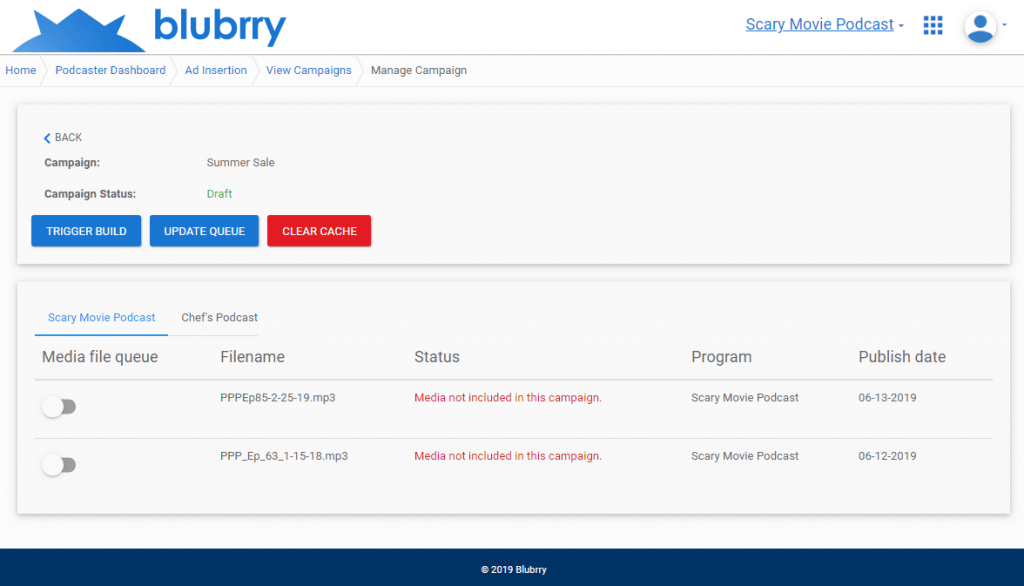
To add past episodes to your campaign, click on the manage media button on the Campaign Details page. Here you will see your episodes listed by program. Simply select the episodes you want to receive your ads, and then click update queue. Newly published episodes will automatically be added to this campaign if it is active. You can also trigger builds from this page once your campaign is active. Now lets head back to the Campaign Details page and start our campaign.
Executing Campaigns
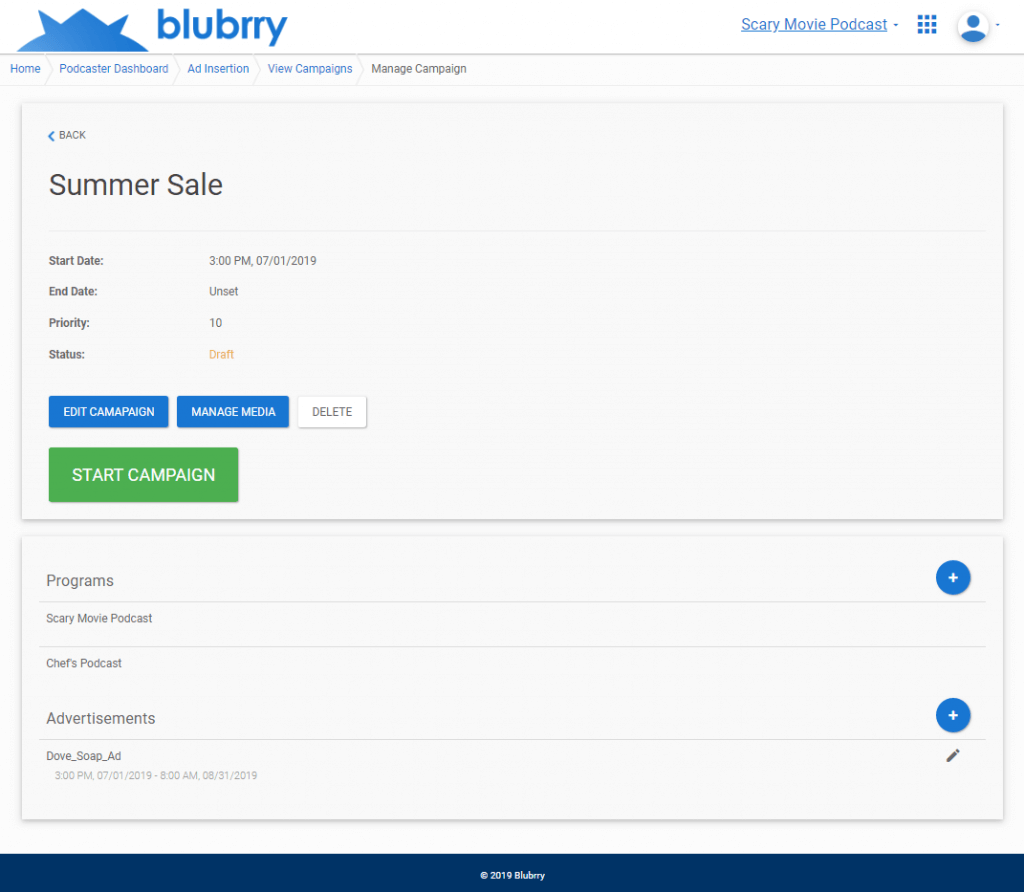
On the ‘Campaign Details’ page your campaign is currently saved as a draft. To go live, click on ‘Start Campaign.’ Then confirm you want to make the changes and you’ll be shown a list of episodes that will be given new builds. Once you confirm this action, you’ll be taken back to the Manage Media page where you can watch the statuses of your media files.
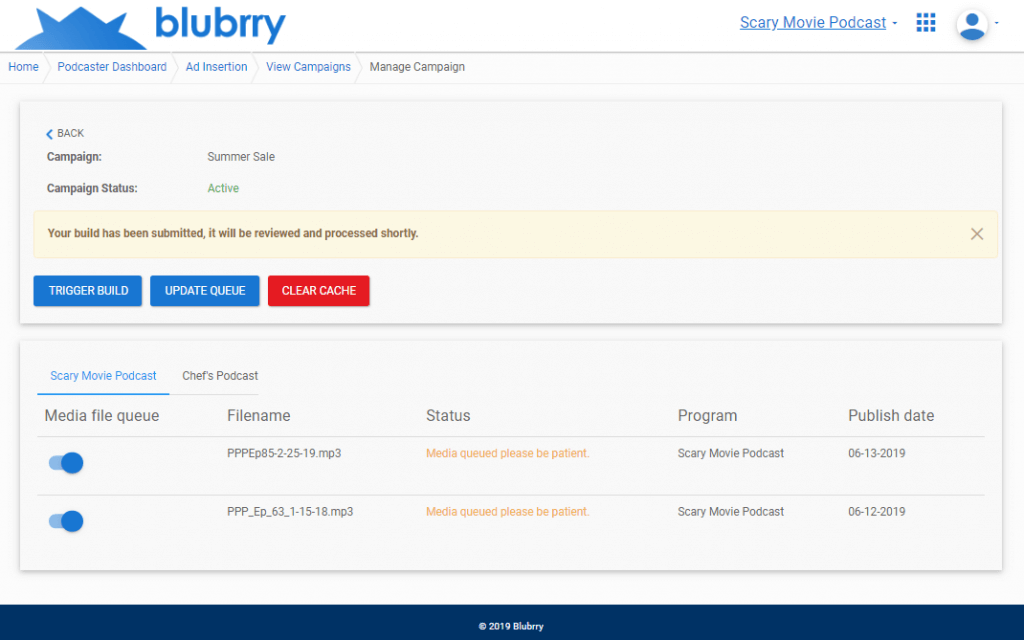
Once your builds are finished and the episodes are available, this screen will update.
